Many designers include assessments within their Captivate lessons. During the informational and practice portions of the lesson, the students can use the navigation bar included with the Captivate skin to proceed through the lesson. However, when they reach the assessment, it's often desirable to disable navigation back to the course content so that the assessment is a true test of what the student can recall. Upon arriving on the scoring and results page, the navigation bar would be turned back on and the student would be able to review the lesson and retake the assessment if necessary.
Now that I've covered why we might want to access these system variables, without further ado, below are the steps I took to accomplish this.
First you need to set up Advanced Actions to turn on and off the navigation bar.
1. Select Project > Actions from the menu and click the Advanced Actions tab.
2. In the Edit / Create Action drop-down, select "Create a new action." Result: A "New action name" field appears
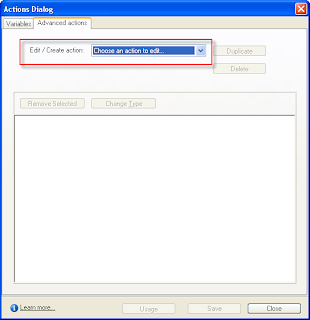
3. Enter a simple and descriptive name for the action.
4. Click Save.
5. Double click on the "Add Statement" text that now appears and double-click again to see a drop-down list.
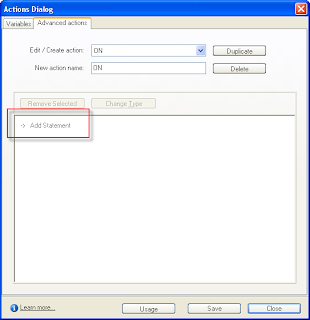
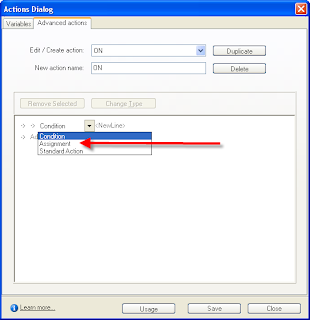
6. Select Assignment. Result: the system variables will replace the current drop-down options.
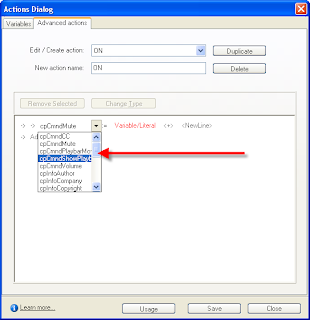
7. Select cpCmndShowPlaybar. The variable will display now with an equal sign to the right of it. To the right of the equal sign, a drop-down appears with the options of Variable or Value.
8. Select Value. A text entry prompt will appear.
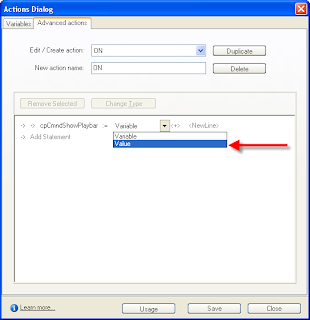
9. Enter the value of 1 to turn on the Nav Bar. (Enter a value of 0 to turn off the Nav Bar.)
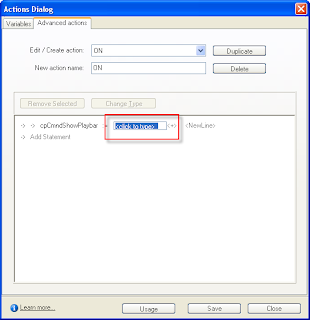
10. Click Save.
11. Repeat the steps above to create an action to turn the navigation bar off.
Now, here is how we used these actions within the Captivate lesson itself.
1. On the assessment introduction slide, add a start button with the setting "Go to next slide" when students click the button. (This is obviously important as the student will have no other means to navigate once the navigation bar is turned off! You could choose to place this action where-ever it makes sense in your own course.)
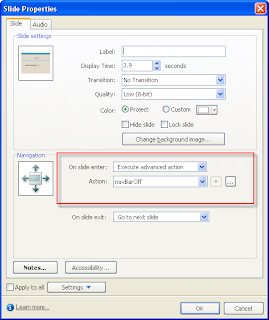
2. Select Slide> Properties from the menu.
3. Change the "On slide enter" value to "Execute advanced action." A second drop-down will appear with the actions you set up.
4. Select the action to turn the navigation bar off.
5. Select the slide where you would like to turn the navigation bar back on and repeat steps 2 and 3, this time selecting the action to turn the navigation bar on.
Test your results! NOTE: I have not tested all different publishing options with this setting, so it may help you to know that I published this to Flash Player 9 and ActionScript 3.


